My quilting thoughts and inspirations sprinkled with a glimpse of life down on the farm
Showing posts with label techniques. Show all posts

Monday, November 19, 2012

Doggone - a finish

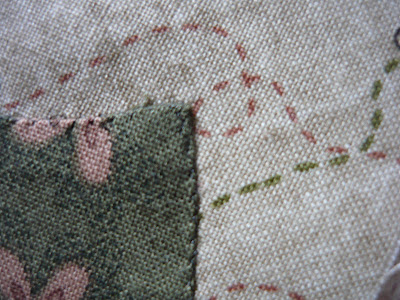
A little while ago I ran a series of 'skills' classes at my favourite quilt shop, The Country Yard. The classes covered stitchery, turned under (needleturn) appliqué, foundation paper piecing and english paper piecing.
Some participants came to all the classes and some just one or two. I devised the project/design below for them to do at home, if they wished to, to practise the skills we covered in class.
My project sat unfinished for a while - firstly, so that the class participants could look at the back of my work to see how I had done something, and then secondly, because I wasn't sure exactly how I wanted to finish it!
I finally decided it would make a perfect cushion, so being inspired, I forged ahead and got sewing. I challenged myself to have some skills practise of my own and had a play with my free motion quilting.
I added some texture to the border and tried to highlight the 
lovely round scallops. 
(English paper piecing class)
Dimension added to the centre panel with the sunflowers
(See how well the variegated thread worked on the centre of the sunflowers?)
The dog might be gone, but he left his bones behind!
I tried to balance the quilting after the 'heavy' border work with meandering
in the flying geese  border (foundation piecing class).
I used subtle quilting so my wonky stitches wouldn't show too much, and so as not to overshadow the initial class work. (Beige and white Mettler Seralene (120 wght) thread).
All in all nothing too earth shattering but a fun thing to do. Lots of practise playing and 'designing'. Nice to see that  practise does help my fmq skills and confidence grow!!
Edges bound and finished as if it were a quilt. I wanted the edging to frame the piece.
Just need to find a 20" inner now.
I played around with fabric for the back. (Having fun)
 At the recent Country Yard exhibition, I was delighted to see these three finished projects from the classes, all made into cushions.
Jan's Cushion
Barbara's one. She also made a second cushion using a slightly different centre block.
 Barb is very good at using up her scraps - these are leftovers
from her beginner's quilt classes last year!
Liz made hers into a cushion cover, also.
A nice display.
It's great to have another project ticked off my list of to-finish projects! (Maybe I can start something new now?....he he just kidding!!)
Have a lovely week everyone,
Happy creating,

Monday, October 22, 2012

Zig-zagging tutorial

Mini-Quilt top. 16.5 inches square.
After I'd written my last post and received the positive comments with readers saying "I'd like to try that, too", I realised I could have expanded a bit on how I put the zig-zag setting together. I have attempted, therefore, to put a bit of tutorial together.
I used the blocks from the Temecula Quilt Company's latest sewalong. They finished at 4", so were 4 1/2" raw edge to raw edge.
The tutorial, sizes, etc will be based on those 8 star blocks from the Temecula sewalong, but of course you can adapt these to suit your own project.

Zig-Zag setting Tutorial.
One of the outer strips.

Out of the fabric you are using for the sashing/zig-zag setting;
-Cut 4 x 6+7/8" squares; cut each one on the diagonal twice to yield 16 triangles.
-Cut 4 x 3+5/8" squares; cut each on the diagonal once to yield 8 small triangles.

The quilt top is put together in strips - the two outer strips have 3 star blocks in them, and the centre one has just 2 star blocks (refer to main photograph).

I found it easiest to lay all my blocks and triangles out on the floor and sew them together from there. (I tend to get muddled otherwise!)
Arrange the left hand side strip first, as illustrated in the photo to the left. Put your star blocks on point and then add the triangles.
(Photo is photo-shopped as I didn't take photos as I made it!)
Note that 2 small triangles go at the top and 2 small triangles are at the bottom of the outer strips.
To sew; first sew the triangles to opposite edges of each star block.
Centre strip
Match the seams when you sew these units together.


The centre strip uses only the larger triangles. You can see the seam lines on the photo to the right where I have had a play with Photoshop.
You will be joining two large triangles at the top and bottom to create the difference in levels of this row. NO small triangles are used in this strip.

When you have sewn all three strips, you will be able to join them to form the quilt top.


Whew!! I am hoping that this was clear - I found it a fun way to put this mini together and I hope you have fun with it too :-)
Any feedback will be welcome!!
Happy creating everyone,


PS My next challenge will be to quilt this - any ideas of what will work well with zig-zags??
PPS As I have said elsewhere, this is not an original design, one that I have seen around but one that I 'started from scratch' in order to put this mini together :-)

Tuesday, March 20, 2012

Quilt Show, blocks and rain

I wonder how many other people took advantage of the free 'Quilt Show' episodes this weekend?  I used up our month's internet allocation but had a lovely weekend pottering in my cave; headphones on, iron going, machine going, listening to and watching wise and entertaining quilters share their quilts and techniques.  Pure Indulgence! (Lucky for me a new month's internet bytes starts on the 20th so I won't have to go without at all).
I have managed to get this round of my Stay At Home Round-Robin quilt done. (This is being hosted by the lovely Sunny over at Quilting Dreams). This round was to be pinwheels or hour glass blocks. I decided the movement of the pinwheels would suit the butterflies. Next round is to be applique which will be a calm round after the previous busyness.

This is the first time I have done this little bit of seam unpicking to make the centre of the pinwheels sit nice and flat. I was a bit unsure about doing it as it seems strange to unpick part of that quarter-inch seam. (And as you can see, I was a bit afraid to go ALL the way).
ONE of the quilt shows I watched in the weekend talked about clipping the seams so that the part that needs to lay one way can do that, and the other the opposite, but it still is cutting into that seam.... the jury is out - any hints or thoughts??
I've also completed my 6th Hop To It block (from the book by Edyta Sitar). Yaay - half way there!!
And now that I have 6 completed I can lay them out for a photo shoot, like Joanne and Wendy have done recently.
I'm loving them!!!
I've also been having a bit of a play with invisible machine sewn needleturn. I do love my hand needleturn but I am always wanting to try new ideas and have an excuse to start more projects!
I found it time consuming to prepare the templates using freezer paper (particularly as my hand applique is done the back basting method which involves no templates) but then found it VERY quick to sew!!
I used a Superior Threads monofilament on top, Bobbinfil on the bottom, a fine needle and a narrow zigzag. Seems to work (the polyester coped with ironing which was another query I had) so think I'll be having a bit more of a play with this.


One reason I was able to hibernate was the rain bucketing down outside... we've just had 2 months' worth of rain in a day. Once we'd made sure the animals were all on high ground, fed and warm, there wasn't much to do but stay inside.
This was the farm yesterday -
-here is it this morning -

 We are lucky that we drain fairly quickly but it will still be a few days before we will be able to get over the bridge to the rest of the farm. As you can tell, our house and main buildings are all up at a higher level than the flood plain. 
Other parts of Northland faired a lot worse than us, and I understand the rough weather is now moving down the country. I'm hoping that anyone else suffering from weather adversaties gets through it safely and drama-free.
On another note, Anne from Rotorua, who emailed me recently about the Hop To It blocks, please can you email me again. My main computer has crashed and I have lost your email so cannot reply to you.
Thank goodness I had done a recent back-up but I do know there are things that I will never see again!
Have a good week everyone,
Thanks for visiting,