My quilting thoughts and inspirations sprinkled with a glimpse of life down on the farm

Monday, December 31, 2012

Trapunto!!

I've been talking a lot about Free Motion Quilting this week, and I promise this is the last post about it for a while!
As well as the monthly tutorials in the SewCalGal FMQ challenge there were 4 bonus tutorials (Wow, that was 16 tutorials altogether, pretty cool huh?!)
I would have dearly loved to try more of them but so far I have only done the Machine Trapunto one by Diane Loomis.
She described using washaway thread to secure an extra layer of batting where we want the puff to be, and supplied us with a design to use.
This is another piece that I really enjoyed doing (is there a theme happening here...? it seems I am enjoying all my fmq-ing experiences at the moment!!).

I decided pebbles would be nice around the flower and I am pleased with how
they highlight it.
Woohoo side view...look it has puff!
I used a piece of fabric I found in my non-quilting-sewing cupboard, a piece I inherited from somewhere along the line. I didn't have any suitable satin (etc) like I have seen others using, but I thought this might offer a different texture or look. It worked ok, but I went through 2 needles on this small piece. I tried ignoring the thunk thunk noise by telling myself that the needle was new only a short time ago but sure enough soon my stitches started skipping. The fabric also had quite a stretch in one direction so I have ended up with the odd little glitchy bubbly bit. I'm sure no one will notice too much! (But it was all good learning about using different fabrics!)
I nearly discarded this photo but decided to keep it as the blue marking really
helps to highlight the detail.
A quick dip in the basin - the washaway thread simply washed away!!
 Diane recommended blocking the piece after washing out the basting thread and markings and I just happened to read Cindy Needham's blog the same day giving clear instructions on how she blocks, so I was inspired to give that a try too.
I didn't quite follow instructions as I didn't do a 'rough' trim  before pinning
it to the board. That would have helped me make it truly square. With this
sized piece I got away with using my eye.
Thank you to Diane for this detailed tutorial and once again to SewCalGal for the huge job she did in running the challenge this year. It's been fantastic!!! Please go here for a quick recap of my year of fmq-ing.
(Many of the tutorials and tutor links are still up (via here) too so take the opportunity to have a little play yourself. At the end of each tutorial is a linky list to visit different blogs to see how everyone has interpreted the tutorial.)

As this year draws to a close, I would like to wish you all a wonderful New Year. Thank you for your visits, your feedback, your encouragement, your inspiration and most of all, your friendship.
I hope 2013 is a year where you fulfil your resolutions, your creativity knows no limits and you and your loved ones are safe, healthy and happy.
See you all next year!

Saturday, December 29, 2012

Filling in.... (fmq)

A tutorial I was behind in for the SewCalGal fmq challenge was the June tutorial by Cindy Needham. Happily I have remedied that (and here is the post to prove it!).
She covered so many areas; as well as the technique she had us practise, she encouraged us to find the comfortable fmq-ing rhythm of our machine, discussed starting and ending techniques and an in-depth guide to designs. In fact I enjoyed Cindy's tutorial so much that I jumped when I saw she was doing a class on Craftsy.
However I feel that I have not done Cindy's excellent tutorial justice. I learnt a lot but my piece looks like a dog's breakfast!!!
She had us take a block and 'divide and conquer' it!! We divided the block up with some swirly lines and then filled in the areas with different fillers.
Boy have I done this - but I went a bit OTT and micro-quilting really seemed to happen...my block is full of LOTS of tiny little areas of this and that.
However I enjoyed playing with the different threads and fillers as encouraged by Cindy, and this block is a good reference point for ideas in the future!!
The quilting all looks fairly messy, I assure you it's not quite so bad in real life!!
(The photos are all of the same block, just taken in different lights).
I borrowed an idea from the Teri Lucas(October) tutorial and quilted
'fmq challenge 2012' in the block.
Playing with ideas (and different threads).
I quite like this 'leaf'. Learning to fill spaces was invaluable.
Oh I love feathers; anywhere, anyhow!!
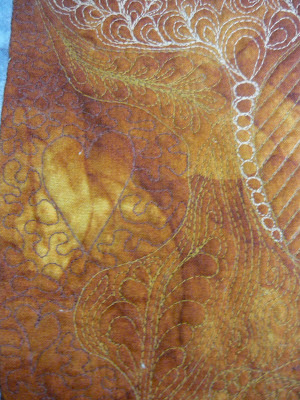
This photo shows the variety of threads and stitches used
and the textures achieved.
This was a really great practice piece. It has good bits and bad bits but is full of information for my future quilting. And I liked how we divided areas up to make them more achievable. Thank you to Cindy for all her information (a lot more than I have shown here) and also again to SewCalGal for hosting the challenge.

{I have now updated my FMQ Challenge 2012 page to include snippets from each tutorial throughout this challenge). 

Happy sewing everyone!!

Friday, December 28, 2012

Borders and Feathers

You may remember that this year I have been taking part in SewCalGal's Free Motion Quilting Challenge. This has been a great challenge as each month we've had new tutorials and ideas to try - a real wealth of information. Part of the challenge requirement was to complete the tutorial each month and add it to the linky list for that month. A great motivation for completing the challenges is that you then go into the draw for some great prizes!!
December's challenge was by Patsy Thompson and she looked at border treatments. Her tutorial is here.
I totally loved this and had fun practising and adding the ideas to my (fmq) sampler quilt. My sampler quilt had a blank rectangular block so initially I had a play in that. These ideas were for using in narrow borders and sashing strips. We learnt about having variety in a series of border strips to add interest.


The feathers were for another border outside the teardrop style one, but as I had run out of space, I decided they would look fine in the centre of the block.

Then Patsy shared a video on one way she does big feather borders.
We started by marking the spine as we normally would
for free motion feathers, but only to the mid-way point.
 Each half of the border is a 'mirror' image of the other. Well actually, its just where the two halves of a border meet that they are mirror images; the rest of the feather is a free for all (so to speak!)(he he).
I made a little plastic template so it worked where the two
 halves of a border met... 
...but eye-balled the corner ones.
  We just marked the spine, no pre-sewing! Also, both sides of the feather were sewn at once (not up one side, down the other as I usually do them).  Scary but it still worked out!! 

I couldn't get these feathers to go all the way to the edges, it looked awful when I tried. I must admit it took me an age to do the first section - the quick unpic was my friend that morning. I also had some directional issues (ie feathers in all directions!) but once I freed my brain they flowed nicely.
So once again, a special thank you to SewCalGal for hosting this challenge. And a big thank you to Patsy Thompson for sharing this month's tutorial.

Thursday, December 27, 2012

Our Kiwi Christmas

Thank you all for your Christmas wishes. From the blogs I've read, it sounds like our family wasn't alone in having a lovely day, it was so nice to spend time with our two daughters and one partner.
(Sadly our son and dil weren't able to be in NZ for Christmas).
Allow me to share a little of what our Christmas was like.
~~~~~~~~~~
I thought that as the kids grew up (our youngest is now 21) that Christmases would lose a bit of their magic but that shows no sign of happening!! (Big smiles).
Gift of the day was this outfit being modelled by Oscar-Riley.
He he! Ever so cute,whenever he shook his head the
bells jingled!!
The antlers didn't fit so well and didn't stay on for long!
Most excited pet of the day - Oscar-Riley - loves getting his own Santa sack. Something must have smelled good as one of the parcels had chew marks!!

This little brooch was made for me by a friend - so cute!!
 It was attached to Oscar's stocking so he would know it was his one.
(It's been retrieved and is in a safe spot now!)
Oh Golly!
 Yummy mains of the day - the simplest Christmas Dinner ever but oh so delicious.
Ham, twice-roasted pork belly and the yummiest salad ever.
Yummy dessert of the day
Pavlova, fresh fruit salad and Christmas cake.
~~~~~~
I didn't do a lot of sewing for my gift giving this year, time ran out on me- but I did manage to complete a couple of small things.
I made two of these Gail Pan ornaments. Easy to make and very sweet.
 And I made two notebook covers.
 You probably know by now that I love making these; I love playing around and coming up with a pleasing (to me!!) design -
(the sheep and the dog appliqué are reduced from blocks in the Quiltmaker 100 Blocks magazines)

These are the backs - I had fun with the four patches!!

Wow - I've just realised what the time is!!Way past bed-time!
Thanks for visiting every-one, may all your days be happy, 

Saturday, December 22, 2012

Wishing you all....

... a very merry Christmas!!
I just wanted to send you all my Christmas greetings. I hope you have a lovely time with your nearest and dearest.
(And best wishes for 2013 - although I'll be back before then!!)
Thank you for your friendship, your visits, and comments and all the fun and inspiration we've shared over the year.
See you soon, 

Monday, December 10, 2012

Christmas prep...

I seem to have had a bit of an unofficial bloggy break (sometimes these things happen!)..so here I am making a concerted effort to put that right :-)
In spite of my limited blog-reading time  I do know there's been a 'bit of talk' about Christmas lately - it's so much fun to see the Christmas spirit around the world so I thought I would add to it as well.
Christmas in New Zealand  for me, goes hand in hand with summer... we seem to be busy busy busy leading up to Christmas then all of a sudden the country stops and most people are in holiday mode. For us on the farm the cows still need milking but it is still a relaxing time of salads and sunblock.
For me, there are little things that get my adrenalin going and get me excited about Christmas coming.....
...Yummy fresh foods start appearing signalling relaxing meals with family and friends...
...The flower garden puts on a nice show before too much summer sun starts drying it out too much. The appearance of my red Christmas lilies lets me know it really is December and that Christmas is coming.
...Likewise the Manuka is in flower giving us our very own special sprinkling of Christmas snow,
It was difficult to photograph but these sprinklings of white flowers are
throughout the bush. Scrubby trees really but the Manuka honey from
them is highly prized. In fact there have been bee wars in our district
lately with 3 different beekeepers wanting to put their hives in our bush.


The bees are as busy as....bees!
[I  took a couple of really neat bee photos yesterday, shown here, if you are interested...]
So I really am feeling Christmassy even if we still have to find a (real) Christmas tree and get some decorations out - we have no children at home this year to bully, nag, motivate us!

I've done a little Christmas sewing - this is all I'm showing of this little project just now; these are 'one good turn deserves another' gifts (or gifts for Random Act of Kindness I have received).
I can tell you though that these blocks have come from the Quiltmakers
100 Blocks magazines; I find them a great resource.
And this morning I finished this 'Art Binder' for my nephew. I'm quite happy with it, and the excellent tutorial for it can be found here.


Some of you will be aware that this year I joined the Farmers Wife Quiltalong with Brynwood Needleworks. The lovely Donna sent me this lovely wee gift recently - just for participating!! Thank you Donna.

I'm impressed you are still with me...! I just have 2 more photos to show - both of little critters ---
Here is my latest Hannah and Harrington block - number 8,
yaay, I'm catching up!!
For those closer friends who have been asking about the new carpet we put
down recently , this photo shows you how well camouflaged
our pets are on it!!
I feel caught up now, thank you all for reading through to the end!!
Wishing you all fun, happiness and excitement in the lead up to the festive season -
and happy sewing everyone,