My quilting thoughts and inspirations sprinkled with a glimpse of life down on the farm
Showing posts with label EQ7. Show all posts

Wednesday, October 1, 2014

Red and White Quilt Challenge


Earlier this year I decided to commit myself to the SewCalGal 'A Year of Red and White Quilt Challenges'. The year started with an EQ (Electric Quilt) Bloghop which I took part in. After having no idea where to start with that post, I had a lot of fun with the Serendipity function and the coolest discovery was transforming this Bear's Paw block —

to this — (Serendipity>Kaleidoscope) —
Then in March there was the Design it! Challenge. I decided to play with EQ7 again and came up with several ideas I thought would look great as a quilt. This was my favourite —

At our annual retreat in May I started sewing up this quilt, and made another major EQ7 learning....look at the block below, the way I put the chains together while designing meant that the centre of this block was rather stupid.... 4 small squares joined together to make one big one - duh! I've always known that you cant just design off EQ7, you also need a working and practical knowledge of quilting and how blocks go together. Back to the drawing board and replacing that tedious centre of the block with one simple square!
 Fast forward a few months and all of a sudden the deadline for entering the SewCalGal Make It challenge was rapidly approaching..time to get busy and concentrate on a little red and white sewing!
First this emerged —
Then this —
 This area is foundation paper pieced. Rather daunting at first but broken down into all its parts it wasn't so bad! (Hehe, when I opened up this block to play with it, EQ7 took great delight in telling me something like Serendipity blocks are not really designed to be sewn and played with. I ignored the warning, so pleased I did!)
Put them together and below we have the result - Choice!! I must admit I raced home from work this afternoon to do the last few seams.... and it still needs a jolly good press, some de-threading, some papers removed and the odd seam resewn (whew) but yaay, I'm pleased to have got to this stage.
And I'm in time to link up with the SewCalGal Make It! Challenge... with an hour or so to spare! Go *here* if you want to see what others have made. It didn't have to be our own design and thank goodness unquilted tops are permitted!
EDIT - I'm also linking up with SewCalGal's Show It! Made It! Designed It! Challenge. To see more original designs go *here* and scroll down a little.
Thanks for reading along and letting me share my quilt (top). It feels great to be able to do that!
Happy creating,

Thursday, March 20, 2014

Red and White Challenges


You may recall that SewCalGal is inspiring us with a year of Red and White challenges. As you (could) know I am a sucker for challenges, especially ones that stretch me out of my comfort zone, so I here I am, taking part :-)
A bloghop and phase one have been and gone but the links are still up if you want to spend some time visiting and viewing some gorgeous Red and White quilts. Visit the bloghop and phase one here.
Now we are into Phase Two. For this we design a quilt!
Yes, that's all!!!
I have used EQ7 for mine but computer software is not necessary.
Anyway, here is what I have come up with......
During the EQ7 bloghop, I took a simple block and played with it, seeing what happened; my Bears Paw became this 'serendipity enhanced kaleidoscope' block.
I really loved this new block and decided I would like to use it as the basis of my quilt design. Examining the block, I am sure the best way to sew it would be by foundation paper piecing. Even that would not be a 5 minute job but I think it would be so worth it! One setting I tried used 4 of these and looked really neat with its secondary patterns emerging, but it would take forever to sew so I ditched it!
Because of the nature of this block I decided it was best suited used as a bigger block; the settings below use it from 12" to 24".
Quilt One -This version has a simple border which I think frames the
main block nicely.
(22" finished, EQ7 estimates I would need 1/2 yd white and 5/8 yd of red).
Quilt Two - In order to make the quilt a little bigger, this version has a
simple chain block to frame it, and an outer border.
The Bears Paw in the border acknowledge the block's beginnings.
(52" finished, estimates 1 1/4yds white and 2 1/2 yds red).
Quilt Three - Here I got even more complex. I really do like the way
the chain blocks frame and mimic the shape of the centre block.
(60" finished,  estimates 1 3/4 yds white and 3 3/4 yds red). 
Quilt Four - This is the same quilt with the addition of the narrow borders,
which I guess could also be red.
(63" finished,  estimates 2 1/8 yds white and 3 3/4 yds red). 
Quilt Five - Inspired by the previous attempts I also came up with this version.
Less complex to sew. I decided the Crown and Cross blocks in the
outer border suited the centre block better than the Bears Paw.
(28" finished, estimates 1/2 yd white, 7/8 yd red
48" finished, estimates 1 7/8" yd white, 7/8 yd red)
Something I do a lot when I am playing around like this is to do print previews to check the cutting requirements to see if a block, size, design is feasible. All of the above 'worked', but of course differ in their complexity. They are all different sizes too, it really was a case of having to do the maths to get everything to fit right.
These designs all passed my 'go out of the room and view it' test. If they didn't look good from 6 metres away, they didn't last.
SewCalGal is amazing at getting great sponsers for her challenges. Island Batik is a sponsor of this particular challenge. They will select their favourite design and the winner will receive fabrics from them to make up the design! (To be eligible for entry to this, I needed to state the estimated yardages of my design/s.) 

If you go *here* and scroll down, you will see the link-up to see what other 'designers' have come up with. I am enjoying reading the stories that go with every-one's designs.
This challenge ends on March 23rd so if you are interested in taking part, it's not too late. The next phase of the year of Red and White Challenges is the 'make it' stage so I would love to know which design you like best - and your thoughts on them all too  :-)
Thank you for reading along,
Happy creating,

Friday, January 31, 2014

EQ Blog Hop - Red & White Quilts


Hopefully you will have seen this Blog Hop this week. It is the kickoff for a year of Red and White Quilt Challenges SewCalGal is running this year.
The idea of this week's blog hop is to show how much fun it is to use EQ software!!
Even if you don't have the software, take a look at the links, you never know what you will learn. The year of challenges is for anyone, you don't have to have EQ software, if you have an interest in Red and White quilts (or even in quilts full stop) you may find something that tempts you. (There is even a challenge for R&W quilts that are already made!)

When it was suggested I take part in this Blog hop I was pretty concerned - I've seen other clever people do fabulous tutorials and make fabulous quilts using their Electric Quilt software, and while I am a keen user, I'm very much an amateur and a wannabee really.
However, we all know the best way to learn is to play. So what if I just played and saw what happened??! Maybe it would encourage others who are in the same boat to do just the same. A whole lot of playing sounded fun to me!!
(If you don't have the software, just scroll through and see the pretty pictures!)
I decided to take one block and see what I could do with it.
Bear's Paw
A word that I love is 'Serendipity'. It sounds good and opens up a world of possibilities.
So my post today is based around the Serendipity function of EQ7. It is not a function I had really looked at before and I have had a blast.
Choose a block you want to play with and click on the following in your EQ7 software.
Work on Block > Block> Serendipity
The first option is 'frame' - lots of possibilities —
Serendipity>Frame
Serendipity>Frame
Serendipity>Frame
 The second option is Tilt —
Serendipity>Tilt
Select the angle you want it tilited at.
It seems to be in increments of .25'
The third option is Merge. For this you need to import another block to merge with your first block.
Not all blocks can be merged, but a bit of playing finds plenty to choose from :-)

Serendipity>Merge
The block above merged with one of my
'framed' Bears Paw.
The fourth option gets even more tricky. Essentially EQ7 takes your block, chops it up and reorganises it!
Clip and Flip.
Serendipity>Clipand Flip
Serendipity>Clip and Flip
Using one of the 'framed' blocks.
Fifth option - Shrink and Flip - more tricky business going on!
Serendipity>Shrink and Flip
Again, using one of the 'framed' blocks.
 Sixth option - Kaleidoscope
Serendipity>Kaleidoscope
There are different options for this,
based on the different quarters that EQ7
splits your block up into.
Seventh Option - Fancy Star
Serendipity>FancyStar
Original Bears Paw block used.
Whew! You can see that just from one block I have created many new ones!! The options appear endless!! Of course not all of them are pretty and not all of them are practical (but what a challenge to sew some of them!!). If I'd known about this button for my Stars class last year I would have saved myself a lot of redrawing!!!
Of course you can open up each new block you have created and edit it, resize, draw in bits (or take bits away), recolour and so on.

So the next phase of my playing was to see how the blocks would work in quilts.
I chose a simple layout with a simple border and just plonked the blocks on it.
Here are some quilt possibilities —
Simple with the original Bears Paw, centre block colours
swapped over.
Using one of the framed blocks
Framed and flipped
Shrink and flip
Combining the kaleidoscope with shrink and flip
(This photo enlarged as the colours went silly on the smaller size.)

A shrunken one in the middle
As you can see, I had a lot of fun while PLAYING! Now to think a little more and work out which - if any - I want to sew up. Some will have funny measurements which will make piecing difficult, some will be better suited to foundation piecing rather than straight piecing and some will go into the delete bucket.
However some are worth a second look and I could end up with something truly unique! 
It doesn't take a lot of time to play but it can be very rewarding - so, if you are like me and have some underused EQ software - PLAY!!!

The other participants in the Bloghop are —

KISSed Quilts with Marlene
Beaquilter with Bea

I haven't visited them yet as I wanted to write my post without influence (or feelings of inadequacy!!)...I look forward to their wise words - the glimpses I've seen when I did the linkups looked very impressive!!

Don't forget to visit SewCalGal too, for more information on this year's Red and White Challenges as well as more EQ7 tips and techniques. 

Happy playing everyone, thankyou for visiting
Have a great day,

Sunday, October 27, 2013

Two Small (very different) Things

A quick little post to say Hello and tidy up a few loose ends...
The first is my One Christmas Item a Month item ... this monthly incentive to add to our Christmas goodies is hosted by the lovely Narelle of Pins and Whiskers.
This is a fairly simple wee decoration made by stitching the reindeer and then appliqueing it to the red. Kinda cute I thought so I may have to make a couple more :-)
{The reindeer stitchery is a beetreedesign. I printed it off in 2010 so I was pleasantly surprised to see the pattern (and others) is still available. I put it together the same way as the cute ornaments of last year's Aurifil Holiday Blog Hop 2012.}
And just in case you think the photo above shows that I have put out my Christmas decorations early.... look at the photo below... clever huh... this is the December page of my Kim Diehl calendar!!

(For those of you not doing the following challenge I won't be in the least bit offended if you hit the delete button now!)
The second loose end is regarding the SewCalGal FMQ Challenge I am doing. When checking out requirements on her site I realised that SewCalGal had challenged us EQ users to share our designs for the "It's All About Borders" Challenge. Woohoo I thought, I have used EQ7 to help me with my border design. Obviously it is probably too late to be of use to anyone else however I will share it anyway.
The challenge item is still under the machine (as we speak) so I am not showing it yet.
Here is the 8-bordered layout I have come up with. Admittedly it is very basic but I did spend some time playing with different widths. The nature of computer design makes it very straightforward to play and experiment; I try to use it when I can as it is all good practise and familiarity.
I decided on increased border widths radiating out from the centre, broken up periodically with unquilted borders.
And here it is drawn up and ready to sew!
Back to sewing those borders, thank you for visiting, see you another time,

Monday, July 1, 2013

EQ7 and warm things....

One of my goals for this year was to become more familiar with EQ7 and use it more. I have been 'pulling it out' from time to time, using it for the odd block here and there but was delighted and excited when the EQ7 blog site (Behind The Mouse) said they were going to do a 'summer drawing series'. And lucky me, I didn't have to wait to do it in summer - I could do it now, in winter!! (hehe).
At the start of each month they post a lesson, showing how to draw a particular block. We have the month to do the lesson, draw the block and then sew it up. At the end of each month is show and tell.
Here is this month's block (Block 2), drawn using the Patchdraw function. It was foundation pieced.
I absolutely love this block!! Now I am thinking to myself, what would a whole quilt with this block look like?! I can see (one day) I will be back to EQ7 to have a play and see what else I can do with it!
Last month's block was drawn using Easydraw. I had it done in time to do a photo link up but not write a post with it in.
Think I will change that centre square but you get the idea.
I like how both blocks have used totally different skills and aspects of the programme.  I have resized my blocks to 9" rather than the 12" drawn in class. Mid-month there have been further mini lessons with variations of that month's block... I have saved these but not done them yet.
Those of you with EQ7, their blog really is a wealth of information, techniques and tips. I didn't really realise how good it was until recently.

For OPAM this month, I made sure I sat down and properly finished off the wrap/scarf I completed in the car recently.... yes, those wool ends were still waiting to be sewn in; without OPAM they possibly would still be waiting, but now it's done! (I have to update my list but I think I am up to anbout 5 finishes this month- woohoo).
Many of you who know me know I love to play.... I spent some time yesterday trying to get the 'perfect' shot of the wrap...
OK.... but a little boring....
 ....the shots of it artisticly draped around various objects were also a little undramatic... but I did like this picture of it around my neck - these uncontrollable curls come in handy sometimes!
I kept it on after the photo shoot... we've had
a few frosts lately!

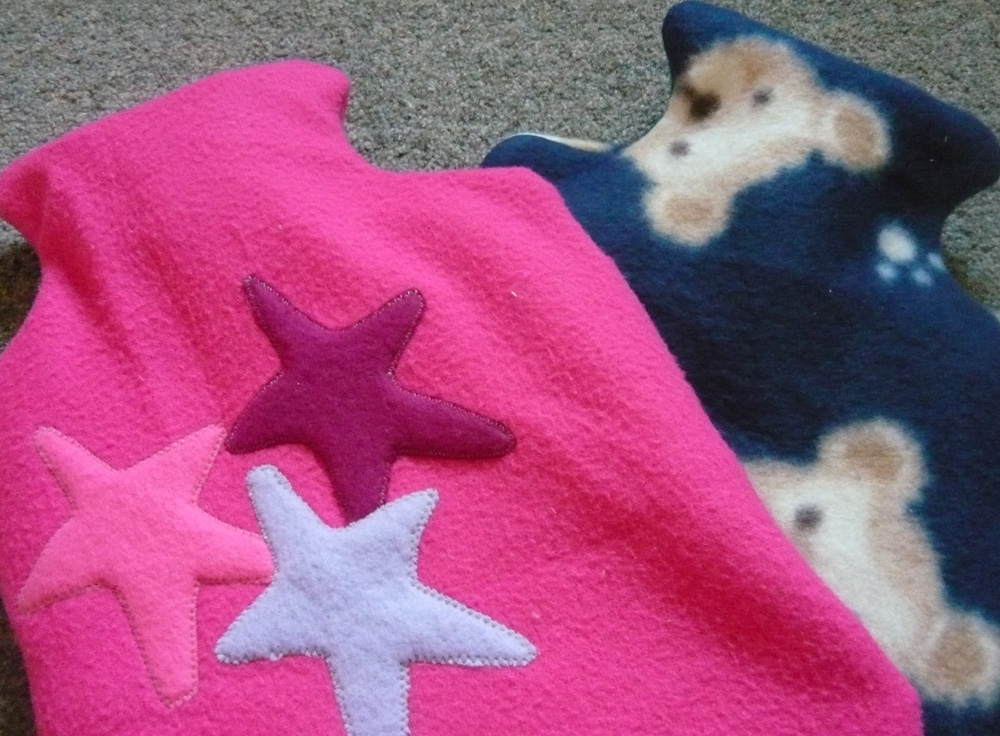
One thing I like about blogging, is the accountability... I've said out loud I'm going to do something... so I had actually better do it! Following up on my intention to make some hottie covers at my sewing group the other night, yes, I did get some made for the Hottie project. Today they are popping themselves in the post and starting their journey to Christchurch. Good on Kerry too who took the pattern home and made the snuggly red ones.

So now it is time to get to the post office. Maybe a little sewing later on this evening.
Happy stitching,